はじめに
NodejsとMysqlをインストールして、とりあえず何かやってみたいと思ったのでチャットアプリ的なものを作ってみました!
この記事を参考にされる方は、NodejsとMysqlのインストールが必要です。インストールされていない場合は、リンク先の記事を参照してください。
環境構築
コマンドプロンプトを起動して、作業フォルダ(名前は何でもいい)の作成と、サーバー/クライアント側の環境構築を行います。
mkdir chatapp
cd chatapp
サーバ側の作成
次のコマンドでサーバー側の環境構築をします。
mkdir server
cd server
npm init -y
「express」「ws」「mysql2」をインストールします。
npm install express
npm install ws
npm install mysql2
クライアント側の作成
次のコマンドでクライアント側の環境構築をします。
cd ..
npx create-react-app client
cd client
srcフォルダにある既存ファイルは不要なので削除します。
del src\*
以下のコマンドは、PackageJsonのProxy設定でエラーを吐く不具合の対処です。
本来は不要のはず。。。(詳しく理解している方いたらコメントください)
npm install http-proxy-middleware
npm audit fix --force
データベースの作成
チャットアプリ用にデータベースを作成します。
コマンドプロンプトからMysqlを起動。
net start mysql80
mysql -u root -p
Mysqlでデータベースを作成する。
create database chatapp;
use chatapp;
create table chat(id INT AUTO_INCREMENT, text TEXT, PRIMARY KEY (id));
quit
コードの作成
サーバー/クライアント側それぞれでコードを作成します。
サーバー側
「server/server.js」を新しく作成して、以下の内容にします。
const http = require("http");
const express = require("express");
const WebSocket = require("ws");
const mysql = require("mysql2");

//Expressの利用
const app = express();
app.use(express.json());

//サーバー立ち上げ
const server = http.createServer(app);

//3001ポートで待ち受け
server.listen(3001, () => {
  console.log("listening on port 3001");
});

//MYSQLデータベース設定
const connection = mysql.createConnection({
  host: "localhost",
  user: "root",
  password: "root",
  database: "chatapp"
});

//MYSQL接続
connection.connect((err) => {
  if (err) {                    //接続失敗
    console.log(err.stack);
    return;
  }
  console.log("db connect");    //接続成功
});

//ブロードキャスト設定
const wss = new WebSocket.Server({ server: server });
wss.broadcast = function (data) {
  wss.clients.forEach(client => {
    if (client.readyState === WebSocket.OPEN) {
      client.send(data);
    }
  });
};

//クライアント接続時の処理
wss.on("connection", ws => {
  connection.query(
    "SELECT * FROM chat",
    (error, results) => {
      const data = {
        type: "init",
        comments: results
      };
      ws.send(JSON.stringify(data));
    }
  );
});

//POSTリクエスト
app.post("/api/comments", (req, res) => {
  console.log("post request");
  connection.query(
    "INSERT INTO chat VALUES (0, ?)",
    [req.body.text],
    (error, results) => {
      const comments = { text: req.body.text};
      const data = {
        type: "comments",
        comments: comments
      };
      wss.broadcast(JSON.stringify(data));
    }
  );
});

//GETリクエスト
app.get("/api/comments", (req, res) => {
  console.log("get request");
  connection.query(
    "SELECT * FROM chat",
    (error, results) => {
      console.log(results);
      res.send(results);
    }
  );
});
クライアント側
「client/src/App.js」を新しく作成して、以下の内容にします。
import React from "react";

//Appコンポーネントの定義
class App extends React.Component {

  //コンストラクタ
  //stateの初期化
  constructor(props) {
    super(props);
    this.state = {
      comments: [],
      text: ""
    };
  }

  //入力完了イベント
  handleChange = (event) => {
    //入力値を設定
    this.setState({ text: event.target.value });
  }

  //ボタン押下イベント
  handleSubmit = (event) => {
    event.preventDefault();

    //入力値を送信
    const comment = {
      text: this.state.text
    };
    const options = {
      method: "POST",
      headers: {
        "Content-Type": "application/json; charset=utf-8"
      },
      body: JSON.stringify(comment)
    };
    fetch("/api/comments", options)

    //入力値を空に設定
    this.setState({ text: "" });
  }

  //DOM描画後処理
  //初期化処理
  componentDidMount() {
    const ws = new WebSocket("ws://localhost:3001");
    ws.onmessage = (e) => {
      const data = JSON.parse(e.data);
      if (data.type === "init") {
        this.setState({ comments: data.comments });
      } else if (data.type === "comments") {
        const comments = this.state.comments.concat(data.comments);
        this.setState({ comments });
      }
    };
  }

  //描画要素の定義
  render() {
    return (
      <div>
        <form onSubmit={this.handleSubmit}>
          <input type="input" value={this.state.text} onChange={this.handleChange} />
          <input type="submit" value="Send" />
        </form>
        <ul>
          {this.state.comments.map((c, i) => <li key={i}>{c.text}</li>)}
        </ul>
      </div>
    );
  }
}

export default App;
「client/src/index.js」を新しく作成して、以下の内容にします。
import React from "react";
import ReactDOM from "react-dom";
import App from "./App";

//Appの描画
ReactDOM.render(<App/>, document.getElementById("root"));
「client/package.json」の最後に「”proxy”: “http://localhost:3001″」を追加する。
直前の「}」の後に「,」を付け忘れがち。以下のコードは参考程度に。
{
  "name": "client",
  "version": "0.1.0",
  "private": true,
  "dependencies": {
    "@testing-library/jest-dom": "^5.16.5",
    "@testing-library/react": "^13.3.0",
    "@testing-library/user-event": "^13.5.0",
    "http-proxy-middleware": "^2.0.6",
    "react": "^18.2.0",
    "react-dom": "^18.2.0",
    "react-scripts": "^2.1.3",
    "web-vitals": "^2.1.4"
  },
  "scripts": {
    "start": "react-scripts start",
    "build": "react-scripts build",
    "test": "react-scripts test",
    "eject": "react-scripts eject"
  },
  "eslintConfig": {
    "extends": [
      "react-app",
      "react-app/jest"
    ]
  },
  "browserslist": {
    "production": [
      ">0.2%",
      "not dead",
      "not op_mini all"
    ],
    "development": [
      "last 1 chrome version",
      "last 1 firefox version",
      "last 1 safari version"
    ]
  },
  "proxy": "http://localhost:3001"
}
動作確認
コマンドプロンプトで以下のコマンドを実行。(chatappをカレントフォルダとして)
cd ./client
npm start
cd ./../server
node .\server.js
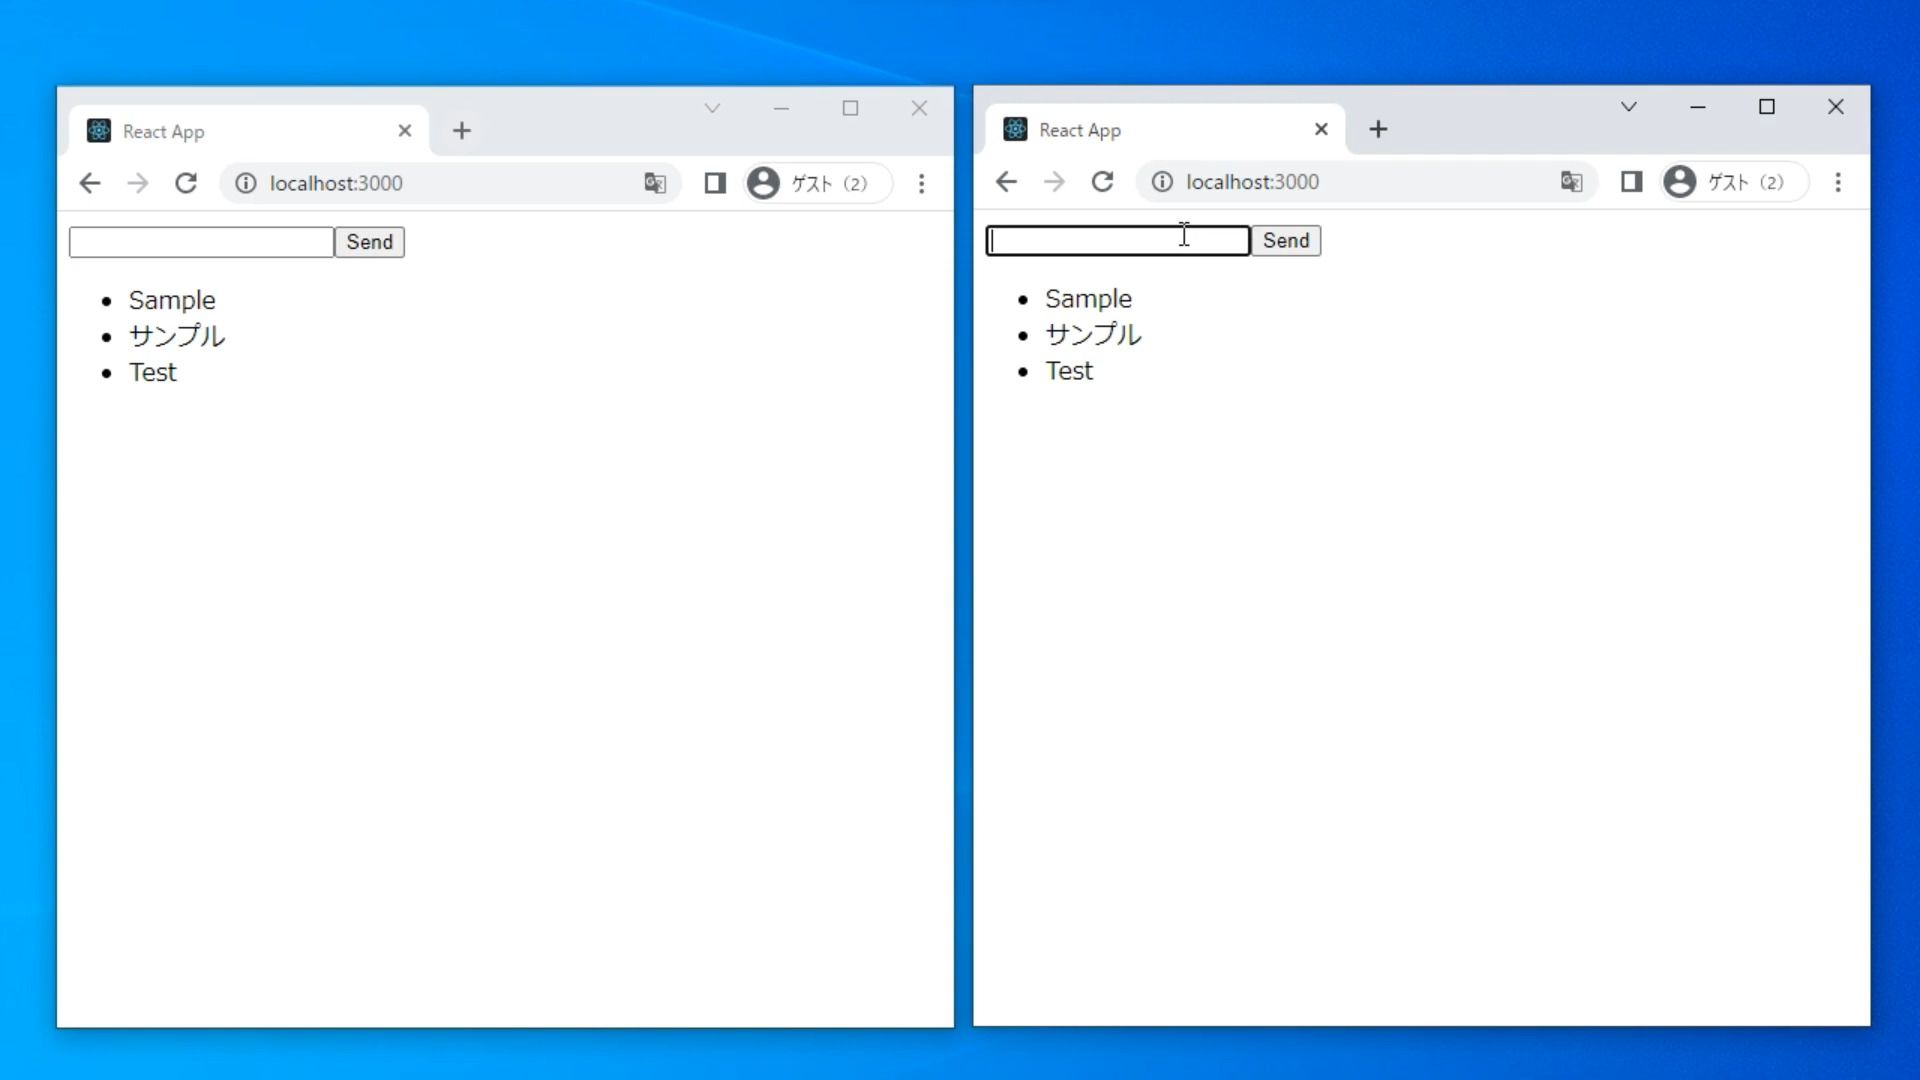
「http://localhost:3000/」にブラウザ上から複数タブでアクセスすると、動画のようにチャットアプリらしき何かができているのがわかる。
最後に
ReactどころかJavascriptにほぼ初めて触ったので、中々難しいなと思いつつ。めっちゃ簡単に出来ると思う部分もあり、いい勉強になったのかなと。


コメント